
Your hard drive is a treasure trove of personal information. You don’t want it getting into the wrong hands if you ever get rid of your computer. An interesting study was done, in which hundreds of computers were bought secondhand and scoured for personal data. They found a lot. Some drives even had enough data to completely steal the previous owner’s identity.
So for the sake of your privacy and security, you absolutely need to “sanitize” your data before handing your drive over to someone else. Darik’s Boot And Nuke (DBAN) can help you with that. For a more in-depth look at data destruction, check out my article How Does Digital File Shredding Work?
Expand Table of Contents
What is DBAN?
![]()
DBAN is a program that wipes your entire hard drive so that it’s no longer readable. There are several tools that do this, but DBAN is one of the most popular.
Originally, I had planned on doing a tutorial on Secure Erase. But after more testing I found that compatibility for that tool is in decline as it hasn’t been updated in years. I like the erasure method that Secure Erase uses more, but for the sake of getting this to work with the majority of readers, I’ve opted to use DBAN instead.
How To Use DBAN
Using DBAN requires creating a boot CD. That means you’ll need a blank CD and a computer with a CD burner to get started. It’s possible to create a bootable USB drive as well, if you prefer that option.
Wiping your hard drive with a tool like DBAN takes some advanced computer know-how. If any of these steps is confusing to you, try enlisting a friend who might be able to help you out. If you can’t find someone, you can always take the computer to your local computer shop and they might do it for a fee. Of course, the other option is to securely wipe your hard drive using a sledge hammer.
1. Back up your data
I have to say it. Before you scrub your hard drive, make triply sure that you have everything off of it you need. You cannot get it back.
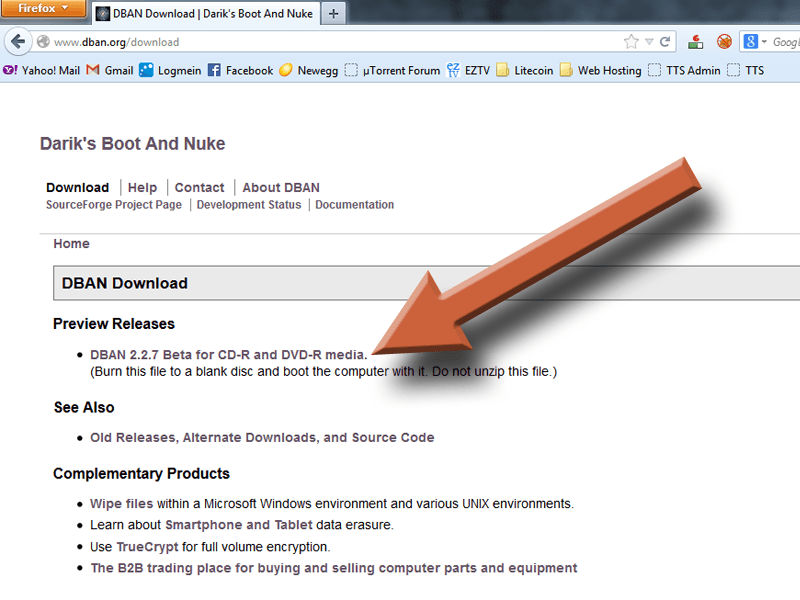
2. Download DBAN
Download DBAN from the official site. The version number you see might be different than what’s in this image. DBAN comes as an ISO file which is meant to be burned to a CD. So don’t try to open it or it won’t work. You can download the file on any computer. It does not need to be the one you’re trying to wipe.
3. Burn DBAN to a CD
To use DBAN, you’ll have to burn the ISO file to a CD. But you can’t do it in the normal way that you burn files to a disc. You’ll have to use a special program that will unpack the ISO and burn it properly. I recommend Free ISO Burner because it’s extremely small and easy to use. Here’s a tutorial for using it if you need some help. When you’re done burning the CD, label the top with a felt-tip pen so you don’t forget what it is.
You can also create a bootable USB flash drive from the ISO file as well, instead of using a CD. But keep in mind that it will erase everything on the flash drive. If you’d prefer that method, you won’t be able to use Free ISO Burner. Instead, try ISO to USB.
4. Remove all the devices you don’t want to erase
Remove all external hard drives, USB flash drives, secondary internal hard drives and floppies that you don’t want to get erased. DBAN lets you select which drives you want to scrub but this will eliminate any accidents that might happen. Murphy’s law is always applicable when dealing with computers.
5. Boot from the CD
This is where it can get tricky. First, put the CD in and restart the computer. If it works, you should see the blue DBAN screen.
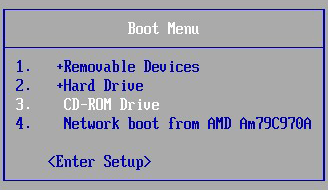
If it just boots up normally and you never see the DBAN screen, try it again but watch closely as it starts to boot up. Look for something in the corner like “F12 = Boot Menu“. It could also be [F11] or something else entirely, depending on the manufacturer of your computer. If you don’t press the key in time, you’ll have to reboot and try again. Once you get it, select the CD Drive from the menu that comes up.
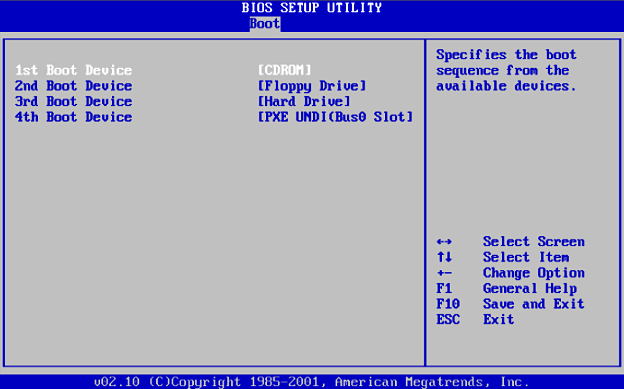
If neither of these work for you, it probably means you’ll have to change the boot order in the BIOS. Reboot your computer again and watch for another key to press that will get you into the BIOS setup menu. Mostly likely it will be either DEL, F1, F2, or ESC. Once you get into the BIOS, you’ll have to find the boot order and change it to read from the CD before the hard drive. This can be tricky. If at all in doubt, try to get some help from a geek you know.
6. Start DBAN in Interactive Mode
Once you are able to boot to the DBAN screen, press [Enter]. I would not recommend using the “autonuke” option. This will automatically erase every drive on the computer. It’s best to press Enter instead so you can manually select the drives you want to erase, just in case you left something connected that you didn’t mean to.

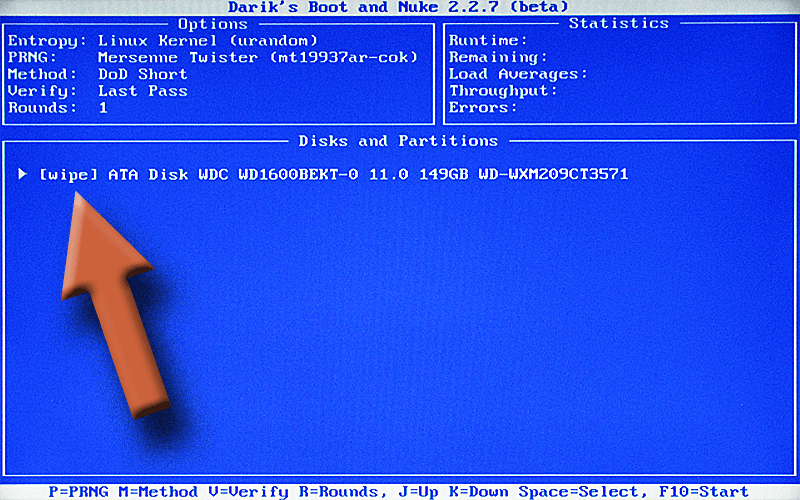
7. Select the drive for erasure
Highlight the drive you want to erase and press [space]. This will insert the word “wipe” in the selection box. If you have more than one listed, I would suggest turning the computer off, then removing any external hard drives or flash drives you have attached. Then start it up again and make sure you only have one drive listed. That way you know for sure that you’re erasing the right one. Otherwise, if you’re sure that you know which one to select, just use the arrow keys to highlight and select it with the space bar.
8. Start the wipe process
Now hold your breath and say a prayer. When you’ve found inner peace and finally released the emotional ties you have with your old data, press [F10]. This will start the erasure process. How long it takes depends on how large the drive is. In the upper right corner of the screen you will see the estimated remaining time as well as some other statistics. In the lower pane, you’ll see a percentage of completion.

9. Let DBAN finish
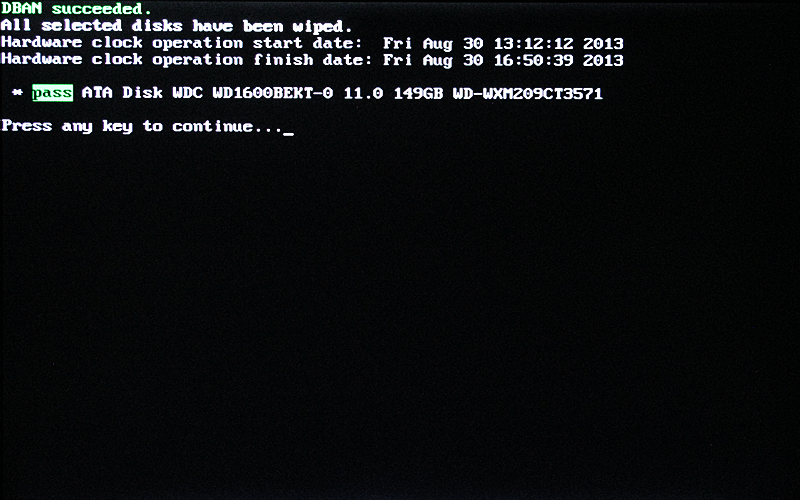
When the process is finished you’ll see this screen. If all goes well you’ll see the word pass in green. You can then remove the DBAN CD and turn the computer off. And you’re done! If you see the word ERROR in red, it means there was a problem erasing the drive and not all the data got scrubbed. Try it again and if it still fails, you may not be able to use DBAN to wipe the drive. Try a hammer instead.
DBAN Advanced Features
DBAN’s default settings should be enough for most people. But if you’re the type that likes to tweak things, there are a few settings you can play with that could increase – or decrease – the effectiveness and speed of the wipe.
Random number generator
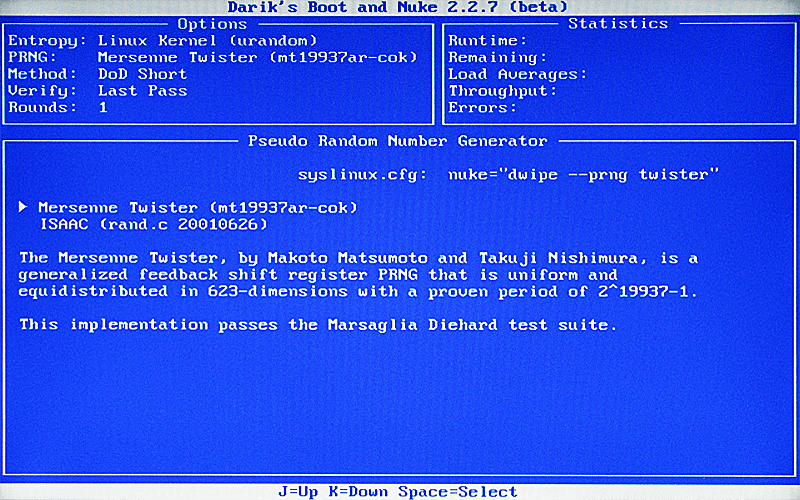
In order to erase the data, DBAN uses pseudo random number generation to overwrite everything on the drive. If you press [P] at the drive selection screen, you can select which random number generator you’d like to use. Only ultra geeks would even care about this selection. I would recommend leaving it default (the Mersenne Twister algorithm).
Erasure method
If you press [M] at the drive selection screen, you can select the type of method DBAN will use to erase your drive. By default, it uses the standard Department of Defense (DoD) Short method. This should be sufficient for just about everyone. But if you’d like to increase the security of the wipe, you can select either DoD 5220.22-M (my preferred method) or Gutmann Wipe. They use more passes, meaning they overwrite the drive several more times than the default, further ensuring that your data is destroyed. But it does take a lot longer.
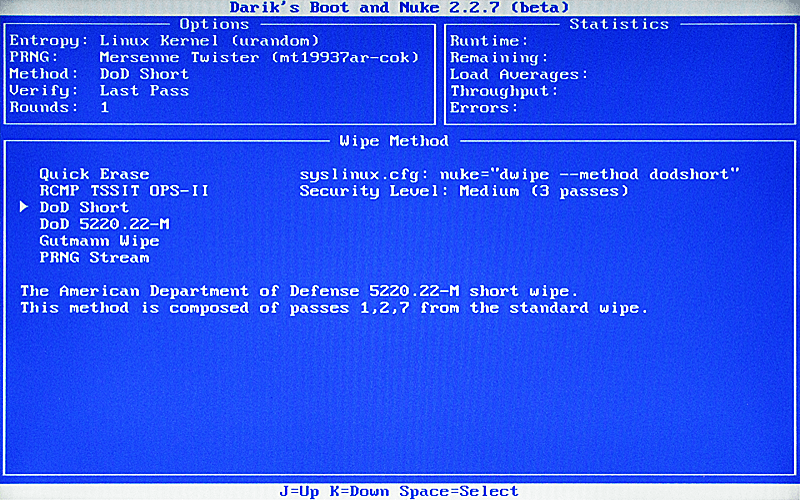
Conversely, if you’d just like to get it over with quickly, you can select Quick Erase to do a one-pass quick wipe which is less secure, but takes significantly less time to perform. I would not recommend using this method.
Verification Mode
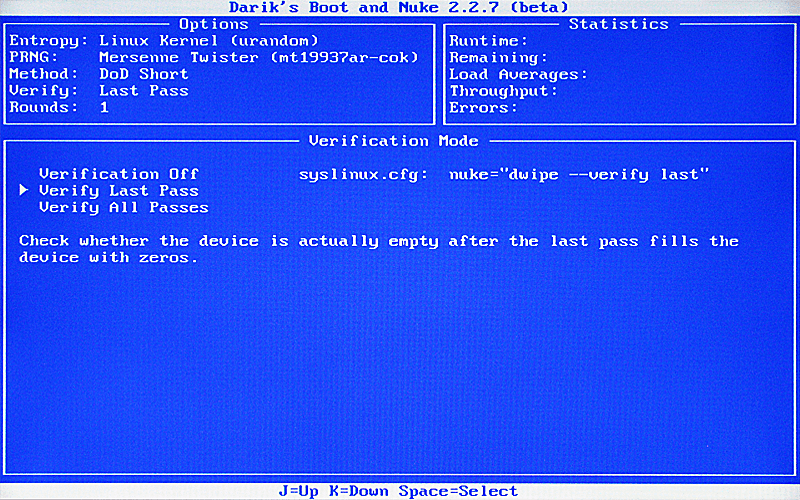
By default, DBAN checks the drive after the last overwrite pass to make sure the data is gone. You can change this by pressing [V] at the drive selection screen. You can turn [Verification Off] completely (not recommended), or select [Verify All Passes] to check the drive after every pass. By default this is three times. Checking after every pass will increase the time it takes to run, since it has to read the entire hard drive after each pass. I would recommend leaving it at the default.
Number of Rounds
If you press [R] at the drive selection screen, you can increase the number of times the wipe is performed. It is set at 1 by default. This number acts as a multiplier to the number of passes. For instance if you use the default DoD Short method which does three passes, and change the Rounds to 2, it will perform six passes altogether, doubling the time it takes to finish. Changing the rounds to three would make a total of nine passes, etc. One round should be enough if you’re using the DoD Short method or better. But I will not discourage you from increasing this number since it will only help to ensure your data is really gone.

Is My Data Recoverable After DBAN?
The easy answer is no, the data is not recoverable. You can’t use a regular program like Recuva or Puran File Recovery to bring back your shredded data. But there’s a longer, more accurate answer…
Yes, it could be possible to partially recover some of your data. This would not be easy, however. The FAQ on DBAN’s website says that it would be possible for “somebody with a lot of time, money, and brains” to recover some data. It would be a very expensive, complicated, tedious process to do. But it is technically possible if you have the motivation and the means. Very few people do. And the chances that one of those people are the ones who would end up with your drive and care enough to do it are extremely slim.
If for some reason this is not good enough for you, you can always take it to a proper facility to sanitize the drive and make 100% sure that it’s not recoverable. However, this is not feasible or necessary for most of us, as it will cost you a lot of money to do.
If you’re still concerned, however, and you don’t need the hard drive anymore, you can always play Thor and reign destruction down with your mighty hammer. Just be sure to destroy the platters inside the drive. Those are the aluminum or glass/ceramic disks that contain the magnetic data on their surfaces. There are usually a few of them in a drive and you might have to take it apart with a screwdriver beforehand, since it could be hard to get through the outer casing with a hammer.
Also, firearms have been known to do the trick if you have some at your disposal.
Is the Trouble Worth It?
Absolutely, positively, without a shred of doubt, yes. You may think you’d never be a target, but all it takes is once. Don’t let it be a hard lesson. Your privacy and security are worth the hassle.
Related Articles