Your Windows firewall should already be enabled by default. But let’s just make sure since it’s such an important layer of your overall security strategy.
What is a Firewall?
A firewall is a shield that protects your computer from the nasties on the outside. Anything that tries to get into your computer is denied, unless you tell it otherwise.
Every version of Windows and nearly every other commonly available operating system has a built-in firewall. There are more advanced firewalls for free or for purchase, but for this guide we’ll stick with the solution that Windows provides.
The Windows firewall is very basic. It works one way, not letting anything in, but letting everything out. It has very simple configuration options, letting you select some of the specific programs or ports that you want to give outside access to. But we won’t cover any configuration settings in this article. We’re only going to make sure it’s enabled.
How To Turn On the Windows Firewall
Select your Windows version to continue. If you don’t know what version you have, visit this page to find out.
How To Turn On the Firewall in Windows XP
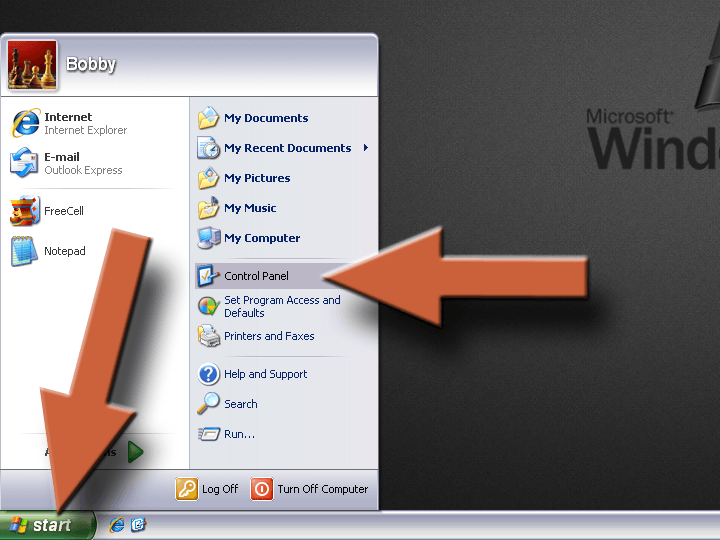
1. Click on the Start button, then select Control Panel.
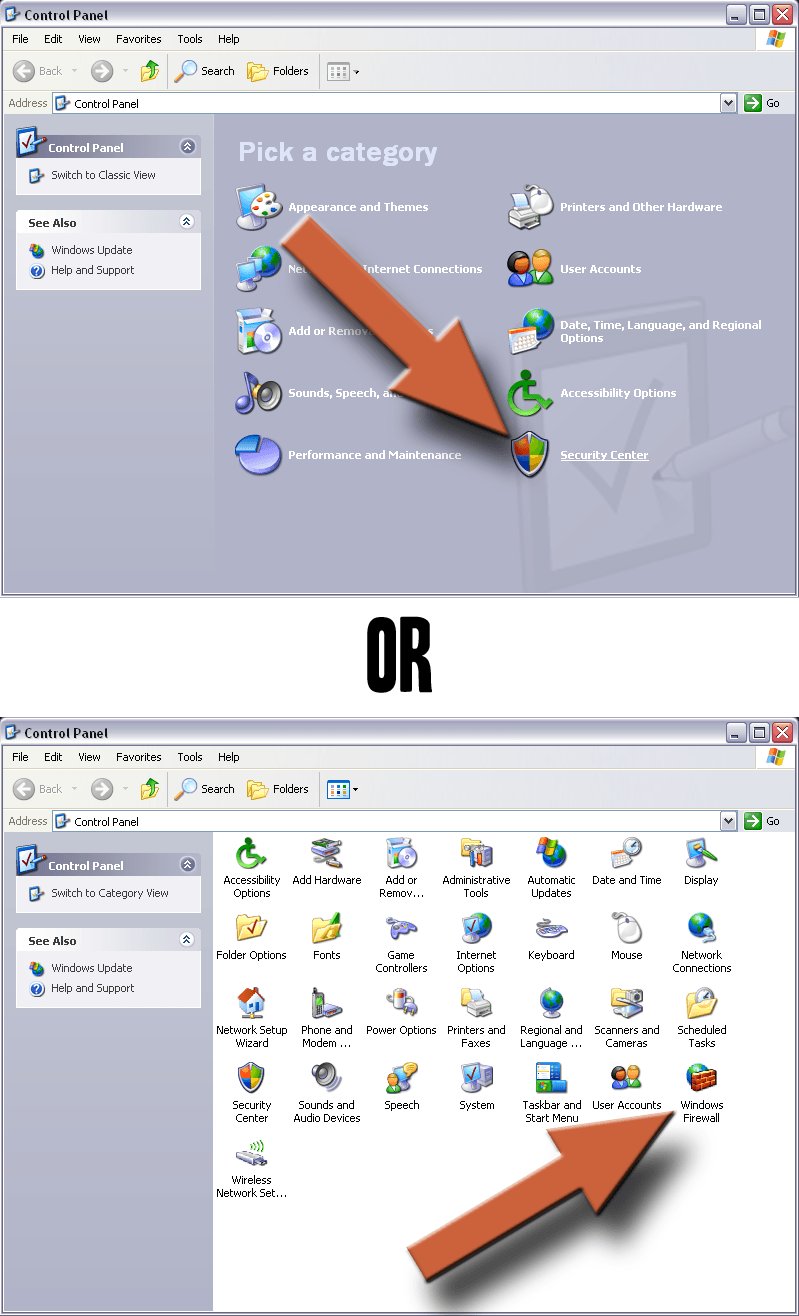
2. Click on Security Center. Or if you have classic view enabled, you’ll need to double click on Windows Firewall instead, then skip to step 4.
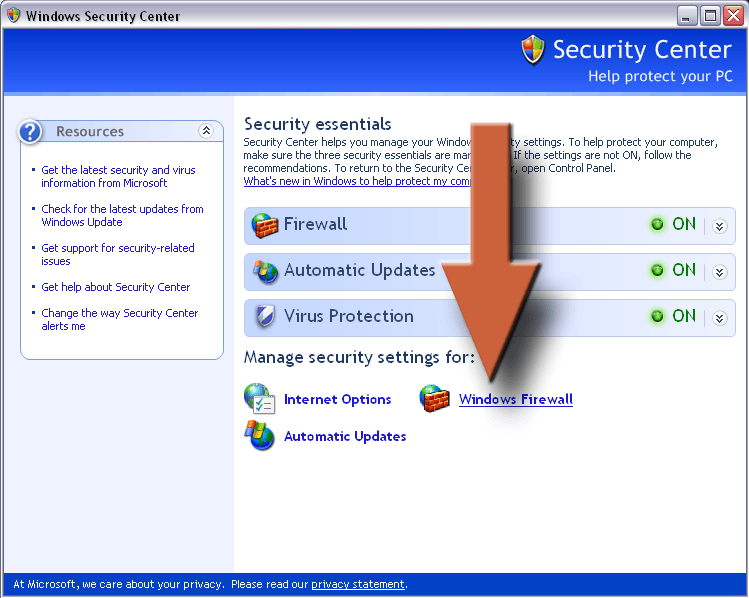
3. Click on Windows Firewall.
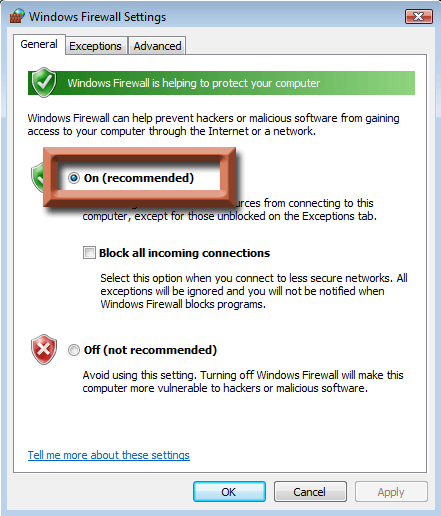
4. Make sure the radial button for On (recommended) is selected and you’re golden!

How To Turn On the Firewall in Windows Vista
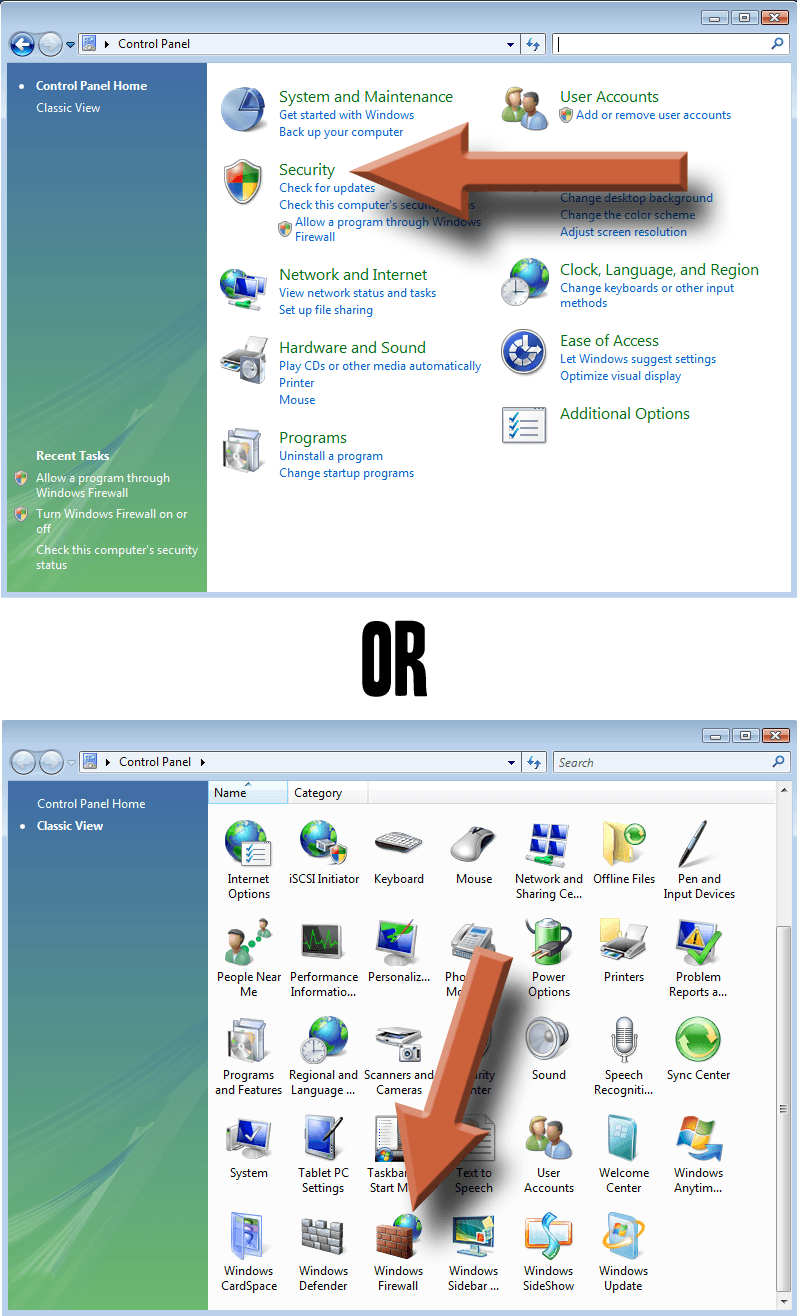
1. Click on the Start “Orb”, then select Control Panel.

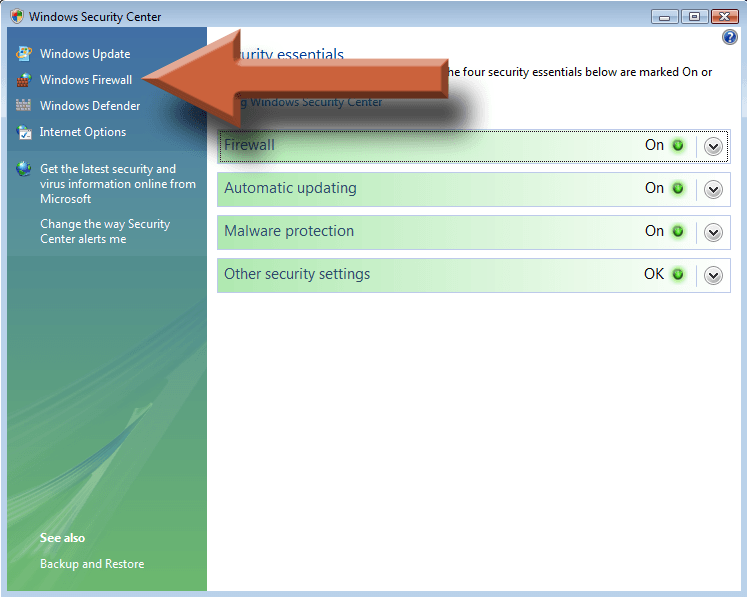
2. Click on Security. Or if you have classic view enabled, scroll down and double click on Windows Firewall instead, then skip to step 4.
3. Select Windows Firewall on the left.
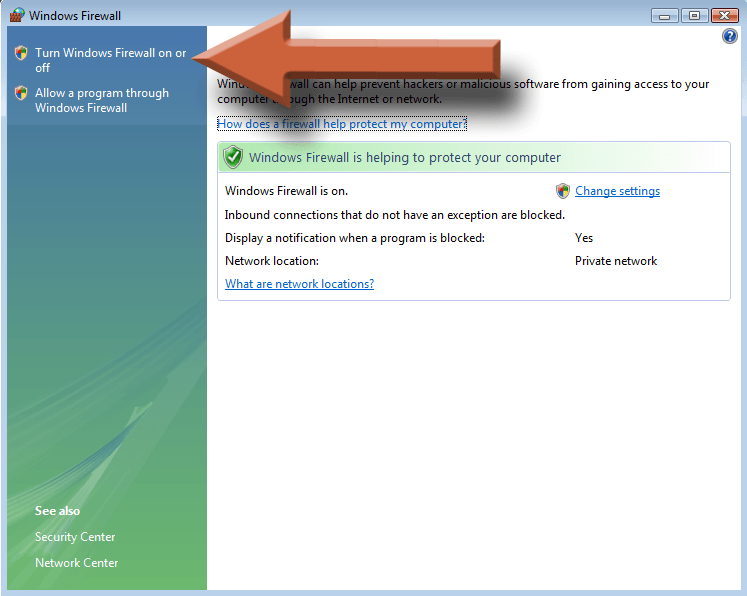
4. Click Turn Windows Firewall on or off on the left.
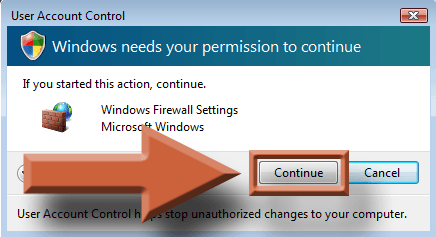
5. Click Continue when prompted by User Account Control.
6. Make sure that the radial button for On (recommended) is selected and you’re done!
How To Turn On the Firewall in Windows 7
1. Click on the Start “Orb” in the lower left corner, then select Control Panel.

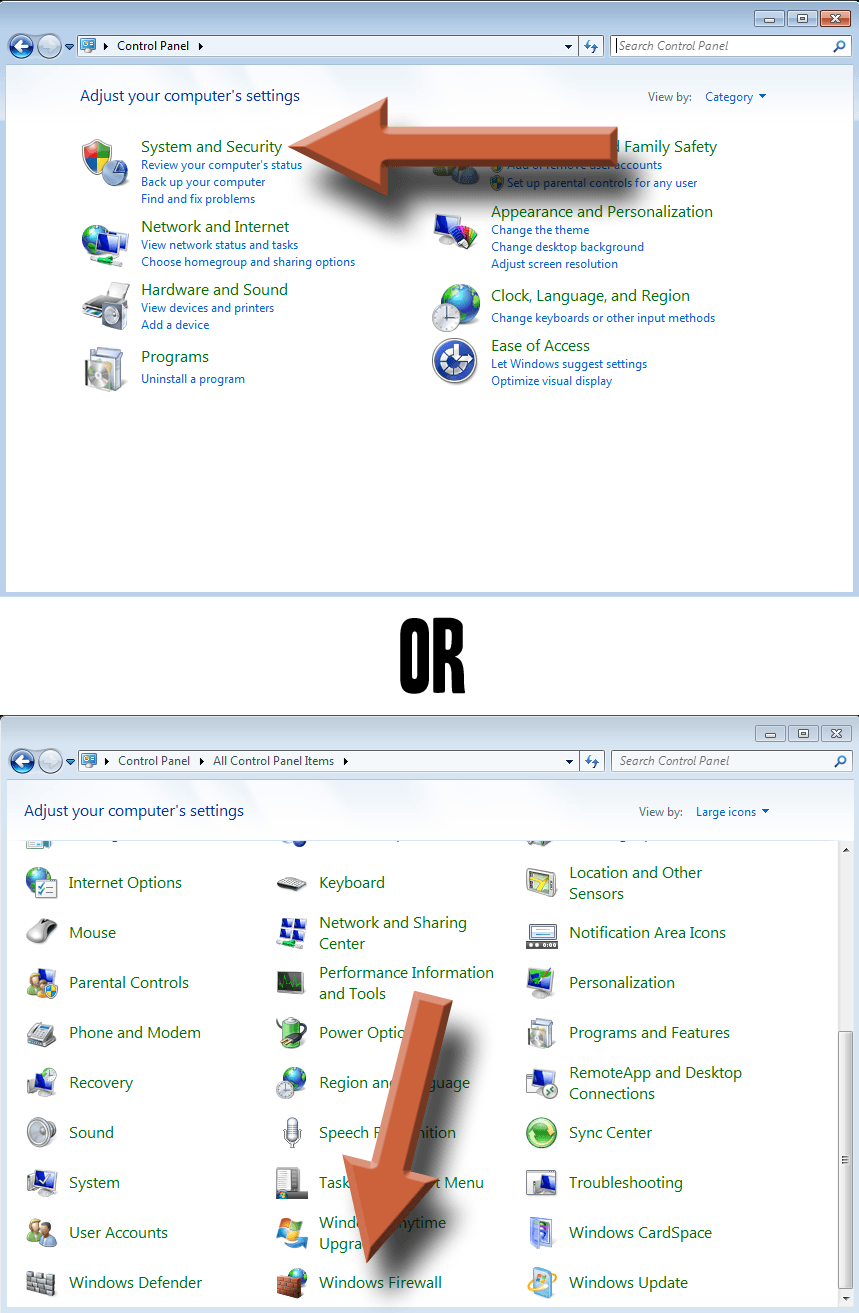
2. Select System and Security. Or if you have the icons view enabled, scroll down and select Windows Firewall instead, then skip to step 4.
3. Select Windows Firewall.

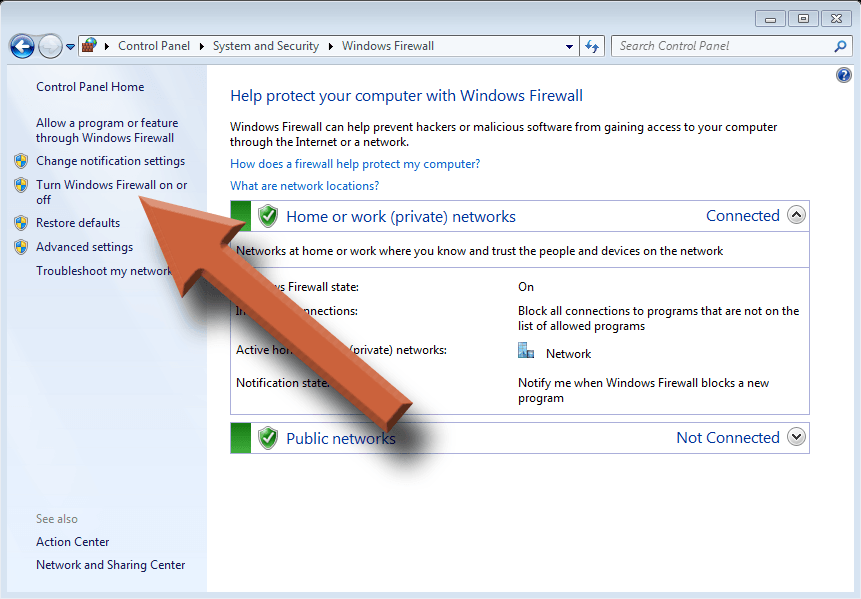
4. Select Turn Windows Firewall on or off on the left side of the window.
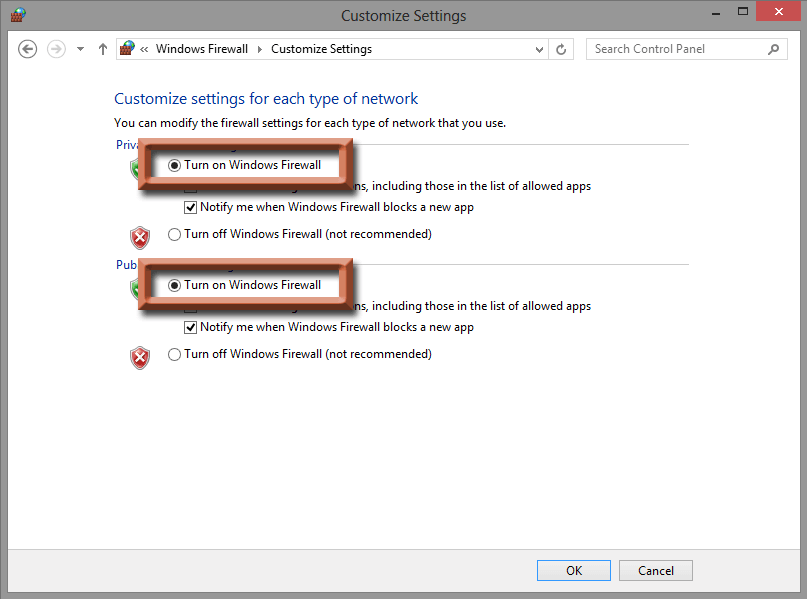
5. Make sure Turn on Windows Firewall is selected in both locations. The top is for private networks like home or work, and the bottom is for public networks like coffee shops and airports. They should both be enabled. Then you’re done!

How To Turn On the Firewall in Windows 8
1. If you’re not already on your desktop, go there now.
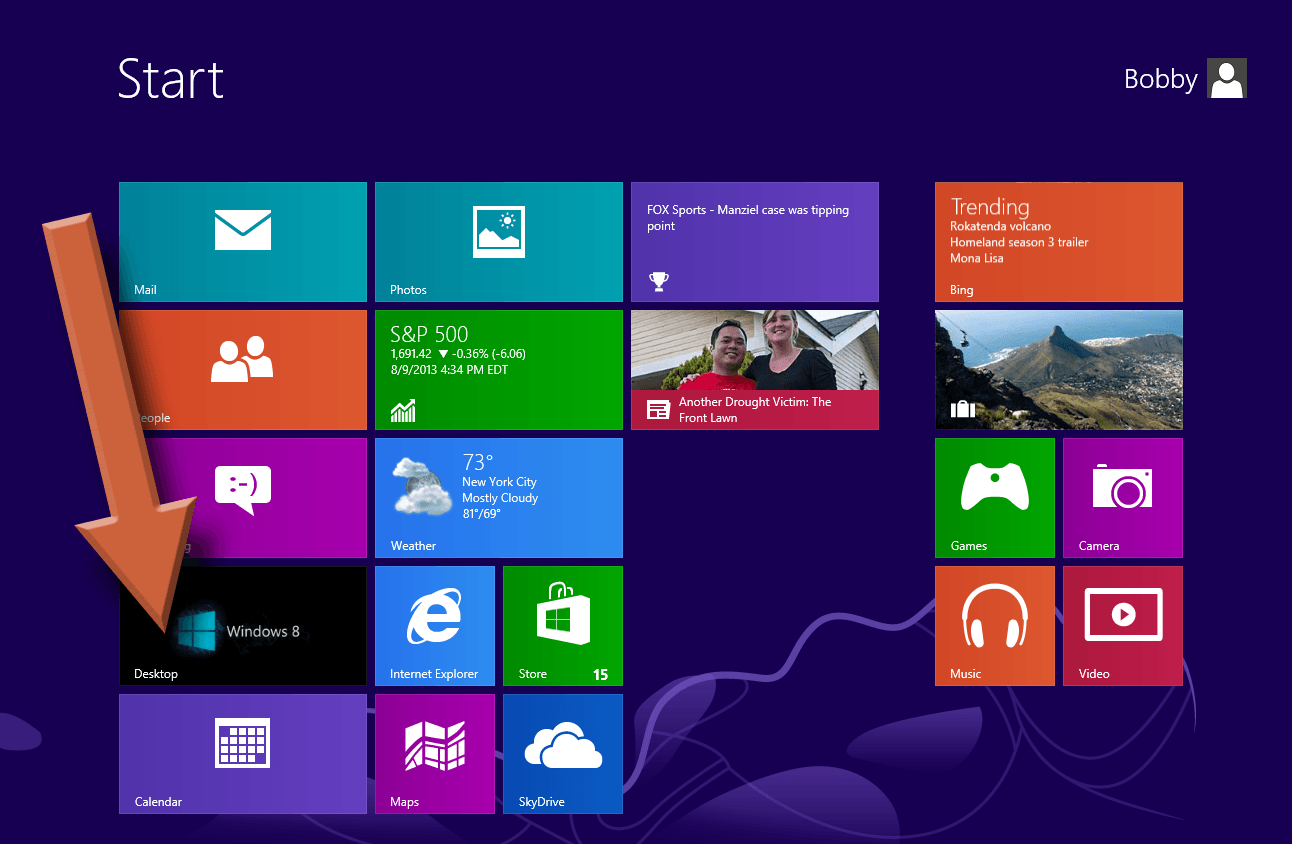
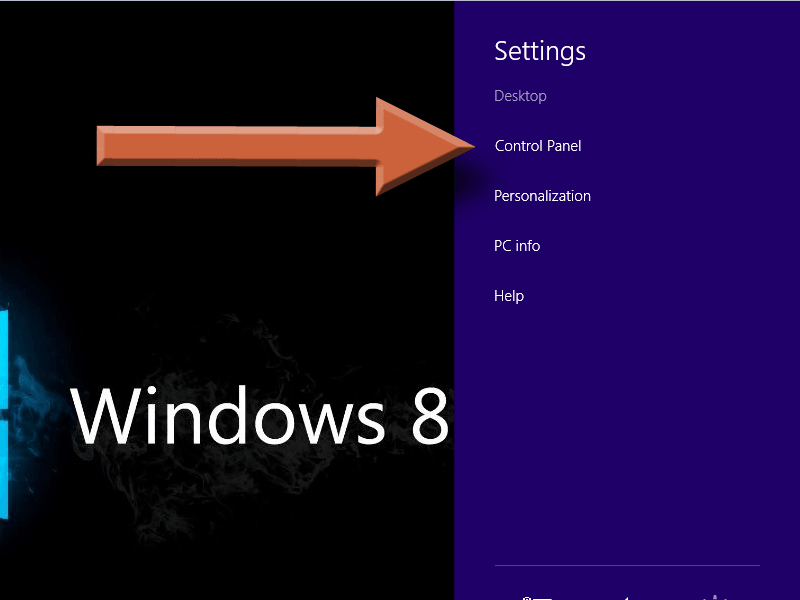
2. Move your mouse cursor to the very bottom right corner of the screen to bring out the charms menu. Then select Settings.

3. Select Control Panel from the slide out menu.
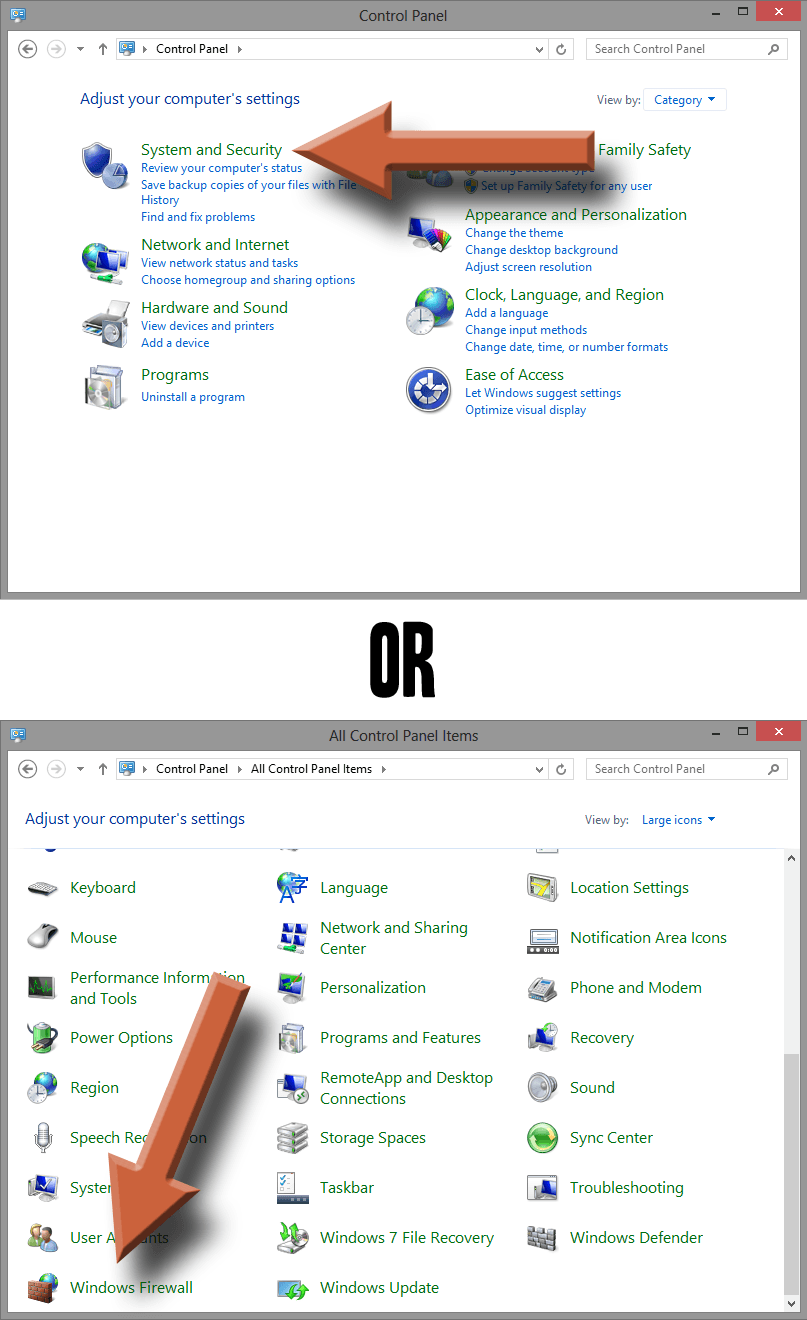
4. Select System and Security. Or if you have the icons view enabled, scroll down and select Windows Firewall instead, then skip to step 6.
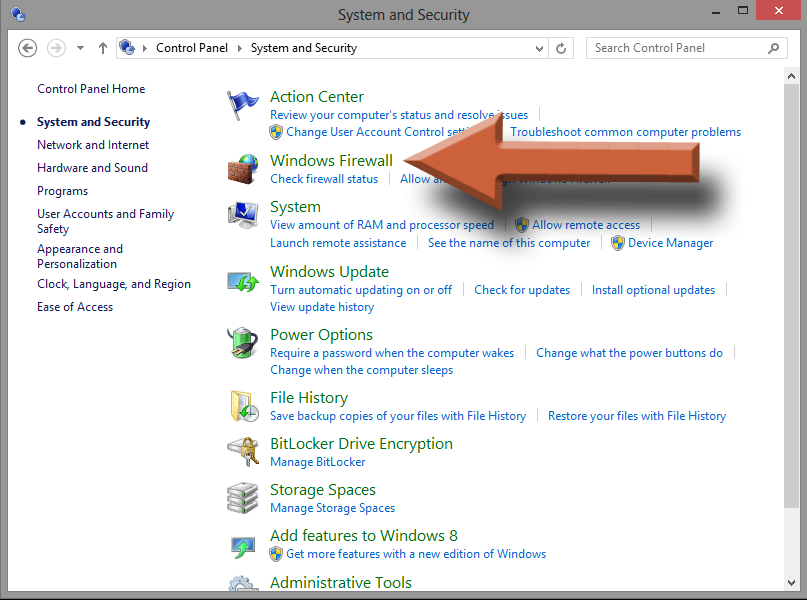
5. Select Windows Firewall.
6. Select Turn Windows Firewall on or off from the menu on the left.
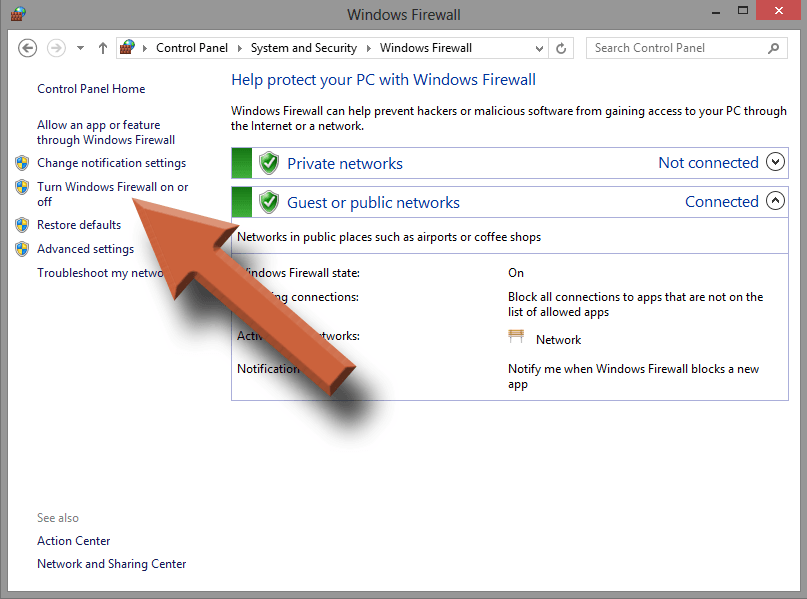
7. Make sure Turn on Windows Firewall is selected for both the private and public networks. Private networks are for things like home and work, while public networks are less secure, for things like coffee shops and airports. They should both be enabled. And you’re done!