STOP! Don’t touch that delete button! If you want to get rid of that file for good, then you’ll have to do something much more severe than simply deleting it. That’s right, we’re going to absolutely kill that sucker by sanitizing it with a special file shredding program. You will never be able to get the file back, so use with caution.
Important Note: File shredding does not work on SSDs and will only wear the drive out faster. For more on this check out my article How Does Digital File Shredding Work?
How To Use File Shredder
There are many free programs that do what we’re about to do, but for this tutorial we’ll be using one called File Shredder because it’s more customizable than most. Some others I would recommend are Eraser or AxCrypt. The latter is actually an encryption program but it offers a shredding function as well.
1. Download and install File Shredder
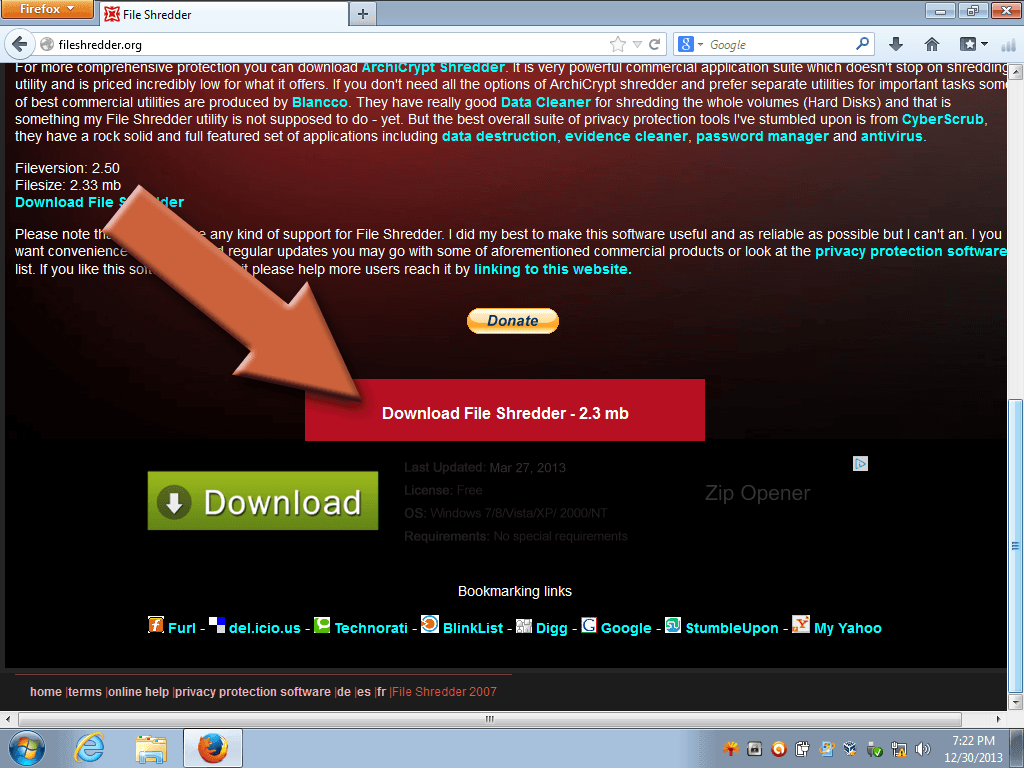
Go to FileShredder.org and click the download button at the bottom.
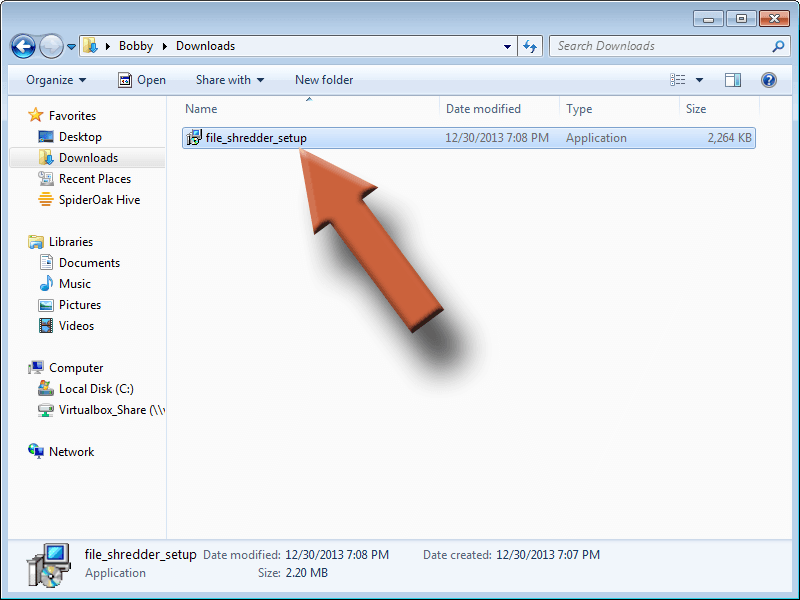
Run the installer after it’s downloaded if it didn’t start automatically. Follow the prompts to install.
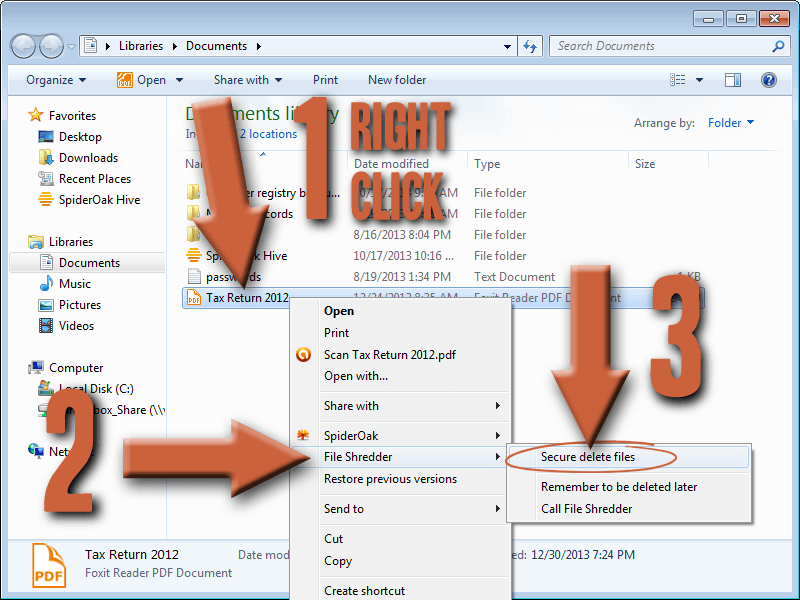
2. Securely delete an individual file
- Right click on the file you want to delete
- Select File Shredder
- Select Secure delete files
How long it takes to erase depends on how big the file is. Small files like regular documents will be so quick you probably won’t even realize it did anything special. But as long as the file disappeared, then File Shredder did its work. You can also delete more than one file at a time by selecting several at once then following the same process.
3. Use the program window to delete several files at once
Maybe you have lots of files you want to shred. It might be easier to do it in the File Shredder program window, especially if they’re in different folders.
First, open the file shredder program. If it didn’t put an icon on your desktop then you should be able to find it in the Start menu.

Then add all the files you want to shred. You can either drag them in from another window or click Add File(s) or Add Folder to find them. Then hold your breath and click the button that says Shred Files Now when you’re ready.
File Shredder Settings and Features
Change the shredding algorithm
The default is the DoD method which does three overwrite passes. There’s really is no need to change this as the DoD method is plenty secure. But if you want, you can:
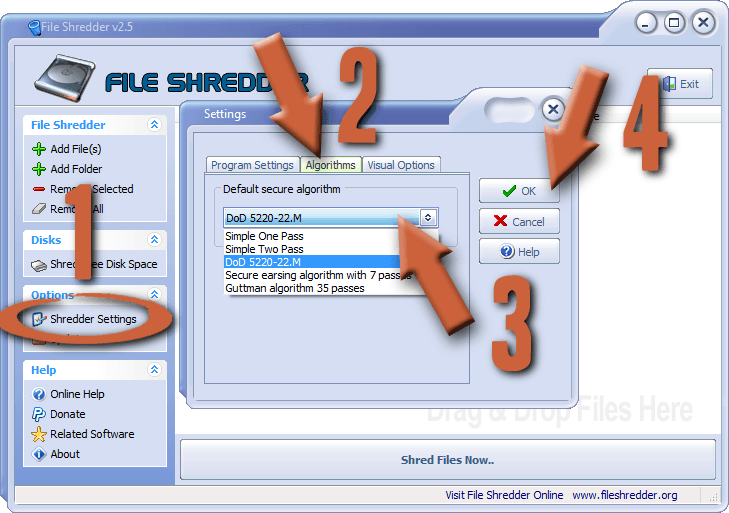
- Click on Shredder Settings in the main window
- Select the Algorithms tab
- Choose a different method from the drop down menu
- click OK
I do not suggest choosing the one- or two-pass methods. Feel free to choose from any one of the others, however.
Note: The method you choose will be the same one used when you use the right click method as described above.
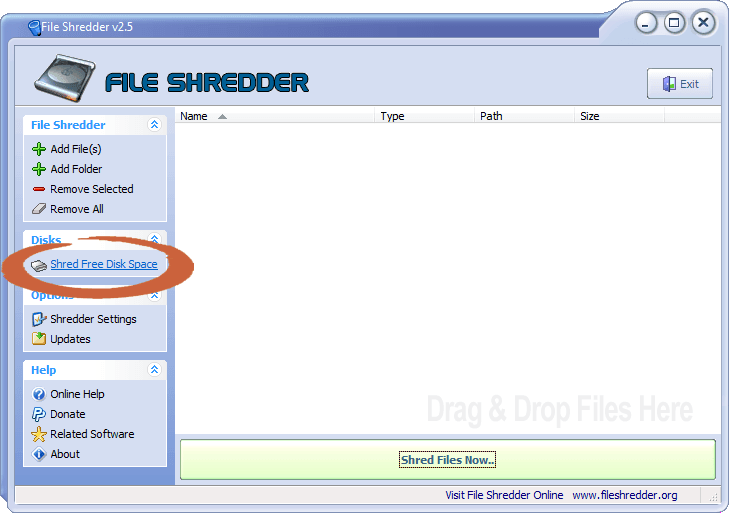
Shred your hard drive’s free space
If you’d like to learn more about why this is necessary, check out my tutorial on shredding your free space with CCleaner.
In the main window click Shred Free Disk Space.
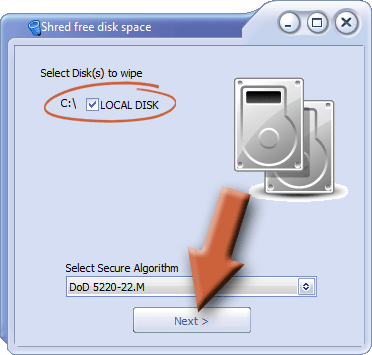
Select the box for the correct drive (there’s probably only one) and click Next. You can also select the erasure method here as well.
Click Start to begin the wipe.
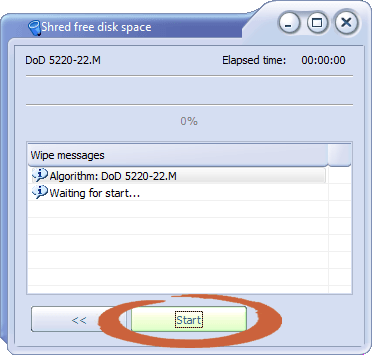
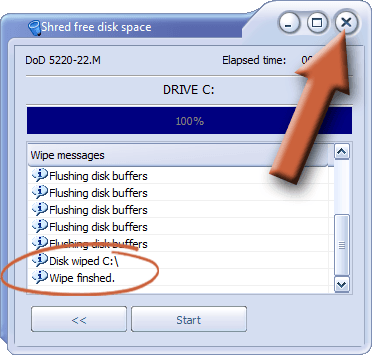
When it reaches 100%, it will say “Wipe finished.” You may have to scroll down the window to see it. Click the X to go back to the main window.
Very Important File Shredding Note
Moving files around can leave unseen copies behind. If you’re moving a sensitive file off of a location to a new location (like from a computer to a thumb drive), you’ll need to take some special steps to make sure it doesn’t leave anything behind.
For example, I have a sensitive file I want to remove from my computer and put on a thumb drive. I can’t just cut and paste the file. If I did, the computer would automatically delete the original file from my computer in the normal way. The original file never got shredded and is still hiding in my free space.
So what I would need to do here is copy the file to my thumb drive first so that there are two copies. One on the thumb drive and one on the hard drive. Then I’d need to manually shred the original file on my computer’s hard drive. That way I’m not leaving one behind where it could be recovered.
The same principle applies when moving files between different hard drives, over the network, or any other move that causes Windows to automatically delete the original file.
When moving files around on the same hard drive this does not apply, because it does not move the actual file. It just modifies the pointer that tells the operating system where it’s located.
If for some reason you think you’ve messed up, you can always shred your free space as a thorough measure, just to make sure nothing gets by. Conveniently, File Shredder provides that function, too.
Related Articles